

Queen of the White Oaks - Texas Trees
I can only speak about my personal struggles when I need to create a “themed” piece. I often take it too literal, and sketch out something hideous or not wearable. I find that reeling myself back to the art and craft of millinery screws my brain back into its place. Going back to the classic skills and materials also guarantees a better hat in the long run. When it came time to figure out a hat in tribute for the Texas native trees art exhibition, I literally drew a tree. How ridiculous right? But before anyone else beats themselves up over similar thought processes, don’t worry, it’s a really common mistake.
After walking around for a couple of weeks with the sketch of an oak tree sitting on a fascinator base, I finally sat down to think about what kind of “hat” was this really, how was it going to shape the face, and could I create a more attractive base? I started with design 101 method: a color palette, and then looked for the florals. Since these trees don’t have flowers, I decided to use the leaves and acorns. I took to pencil and paper and sketched a completely new design. With an impending deadline, I did something entirely new, which was write down my task for each day, and allowing for some “Boo Boo” days to fix any mistakes. (I did have one Boo Boo day.)
I turned to nature for the rest of my inspiration, and learned about acorn season and its corresponding leaf colors. Even though it’s Spring time here in Texas, my hat was going to be a Fall piece. To avoid making everything brown and drab looking, I chose a vibrant green base which resulted in a lovely contrast.

Queen of the White Oaks
March has been a busy month for bespoke hats, preparations, and marketing. By the time I started making Queen of the White Oaks, I only had about nine days left. Less, when you think about having to start with a completely new (but better) design. For those new to millinery, figuring out a color palette is vital, and then the foundation materials fall easier into place. Even though it was a Fall season for the Oak, I wanted it to feel season-less by choosing silk instead of straw or felt. I built the foundation using buckram and my crown block, and stabilized the base with wire. While the base was drying, I began looking for leaf shapes from White Oak trees, and prepped my green silk by adding interfacing to the back.

I stabilized the silk before draping it on my base frame using the poupee head.

Base draped, covered, and hand stitched.
I went through three versions of leaves. First using white organza silk, then white Hobatai silk, a gold charmeuse silk which turned out great with silk paint but difficult to stabilize. I did begin to panic when all three silk pieces failed. But hidden under a pile of pre-stiffened silk was a piece of gold silk Dupioni, and I knew it was meant to be. The Dupioni took the many shades of paint well, and the gold color was a better choice than starting with a white base.
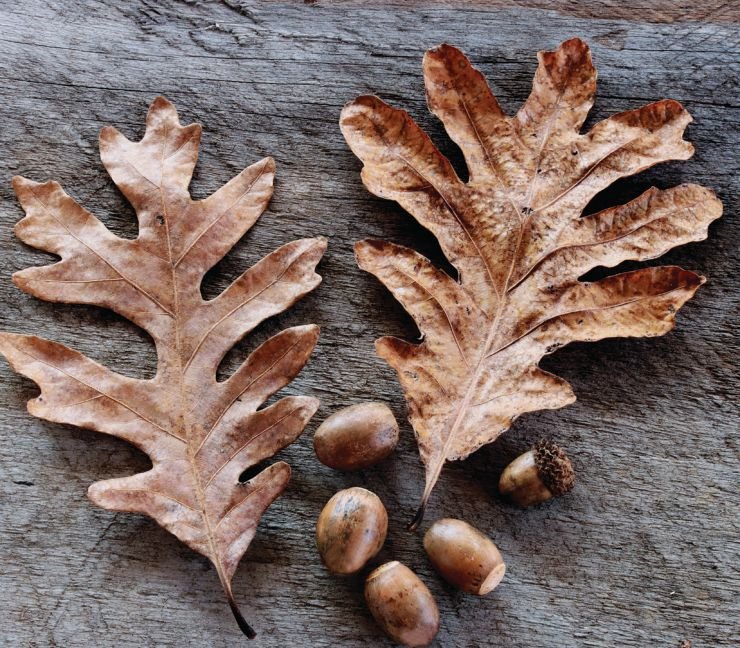
This was an image of live samples I found to model my leaves and acorns. They are much duller in real life, and we aren’t imitating real life. When we make hats, we create what we think it should look, and in my eyes, they were rich and golden.

I cut out 24 leaves, just in case. I needed identical fronts and backs, so when completed, I only had 12 leaves in total.
When all the leaves were drying, I started on the polymer clay acorns. You can see in this video how crunchy they sound before I tooled them.

My first painted leaf. I went back and trimmed all 12 leaves, cleaning up the edges. The natural woven lines of the silk added some good texture to the leaf.

My finished acorns.
I forgot to document my polymer clay process, but I did have to make these three times, because attaching the stem was difficult. I chose to bake the wire inside the clay instead of leaving a hole for the wire, and gluing them in later. This was the final three chosen for the hat. I used some cutting tools for the texture, and painted them brown. Even though my clay was already brown, the added paint gave it a richer, deeper look. I also painted the tops with gold acrylic paint, and applied gloss once everything dried.
Finding the correct proportion was important; the acorn to leaf ratio. My first acorns were much too large and if you are familiar with polymer clay, they are not light. I did not want to risk the weight of the clay acorns causing the hat to slump in any direction. Three seemed plenty.

Comparing the leaf to acorn ratio.
Once all the leaves and acorns were finished, I moved onto the bottom lining of my crown, which was also cut from and shaped from Buckram, and covered in the same silk. This is usually a final task, but having it ready to attach in the end would speed up the completion. This is also the time to attach any elastic, combs, and my hat label to the base. I also made two biased ribbons to provide a little height and different texture to the hat.
Sewing the lining is my most dreaded task. Some linings are easier than others, but in the case of a crown, it’s one of the worst ones to tackle. The hat is at the museum, so I will have to update the underside photos later. This was where my Boo Boo day was used. After completely finishing the base underside lining, I discovered it was too big all around to sit flush inside the base. No one wants the inside lining sticking out from under the base. I had to unstitch the lining, recut it, and then cover it a second time with the corresponding silk. This whole process made me cry a little on the inside.
I know myself well enough that building Boo Boo days are necessary. This hat was a completely new design, down to the base draping, leaves, and polymer clay. A mistake was inevitable.
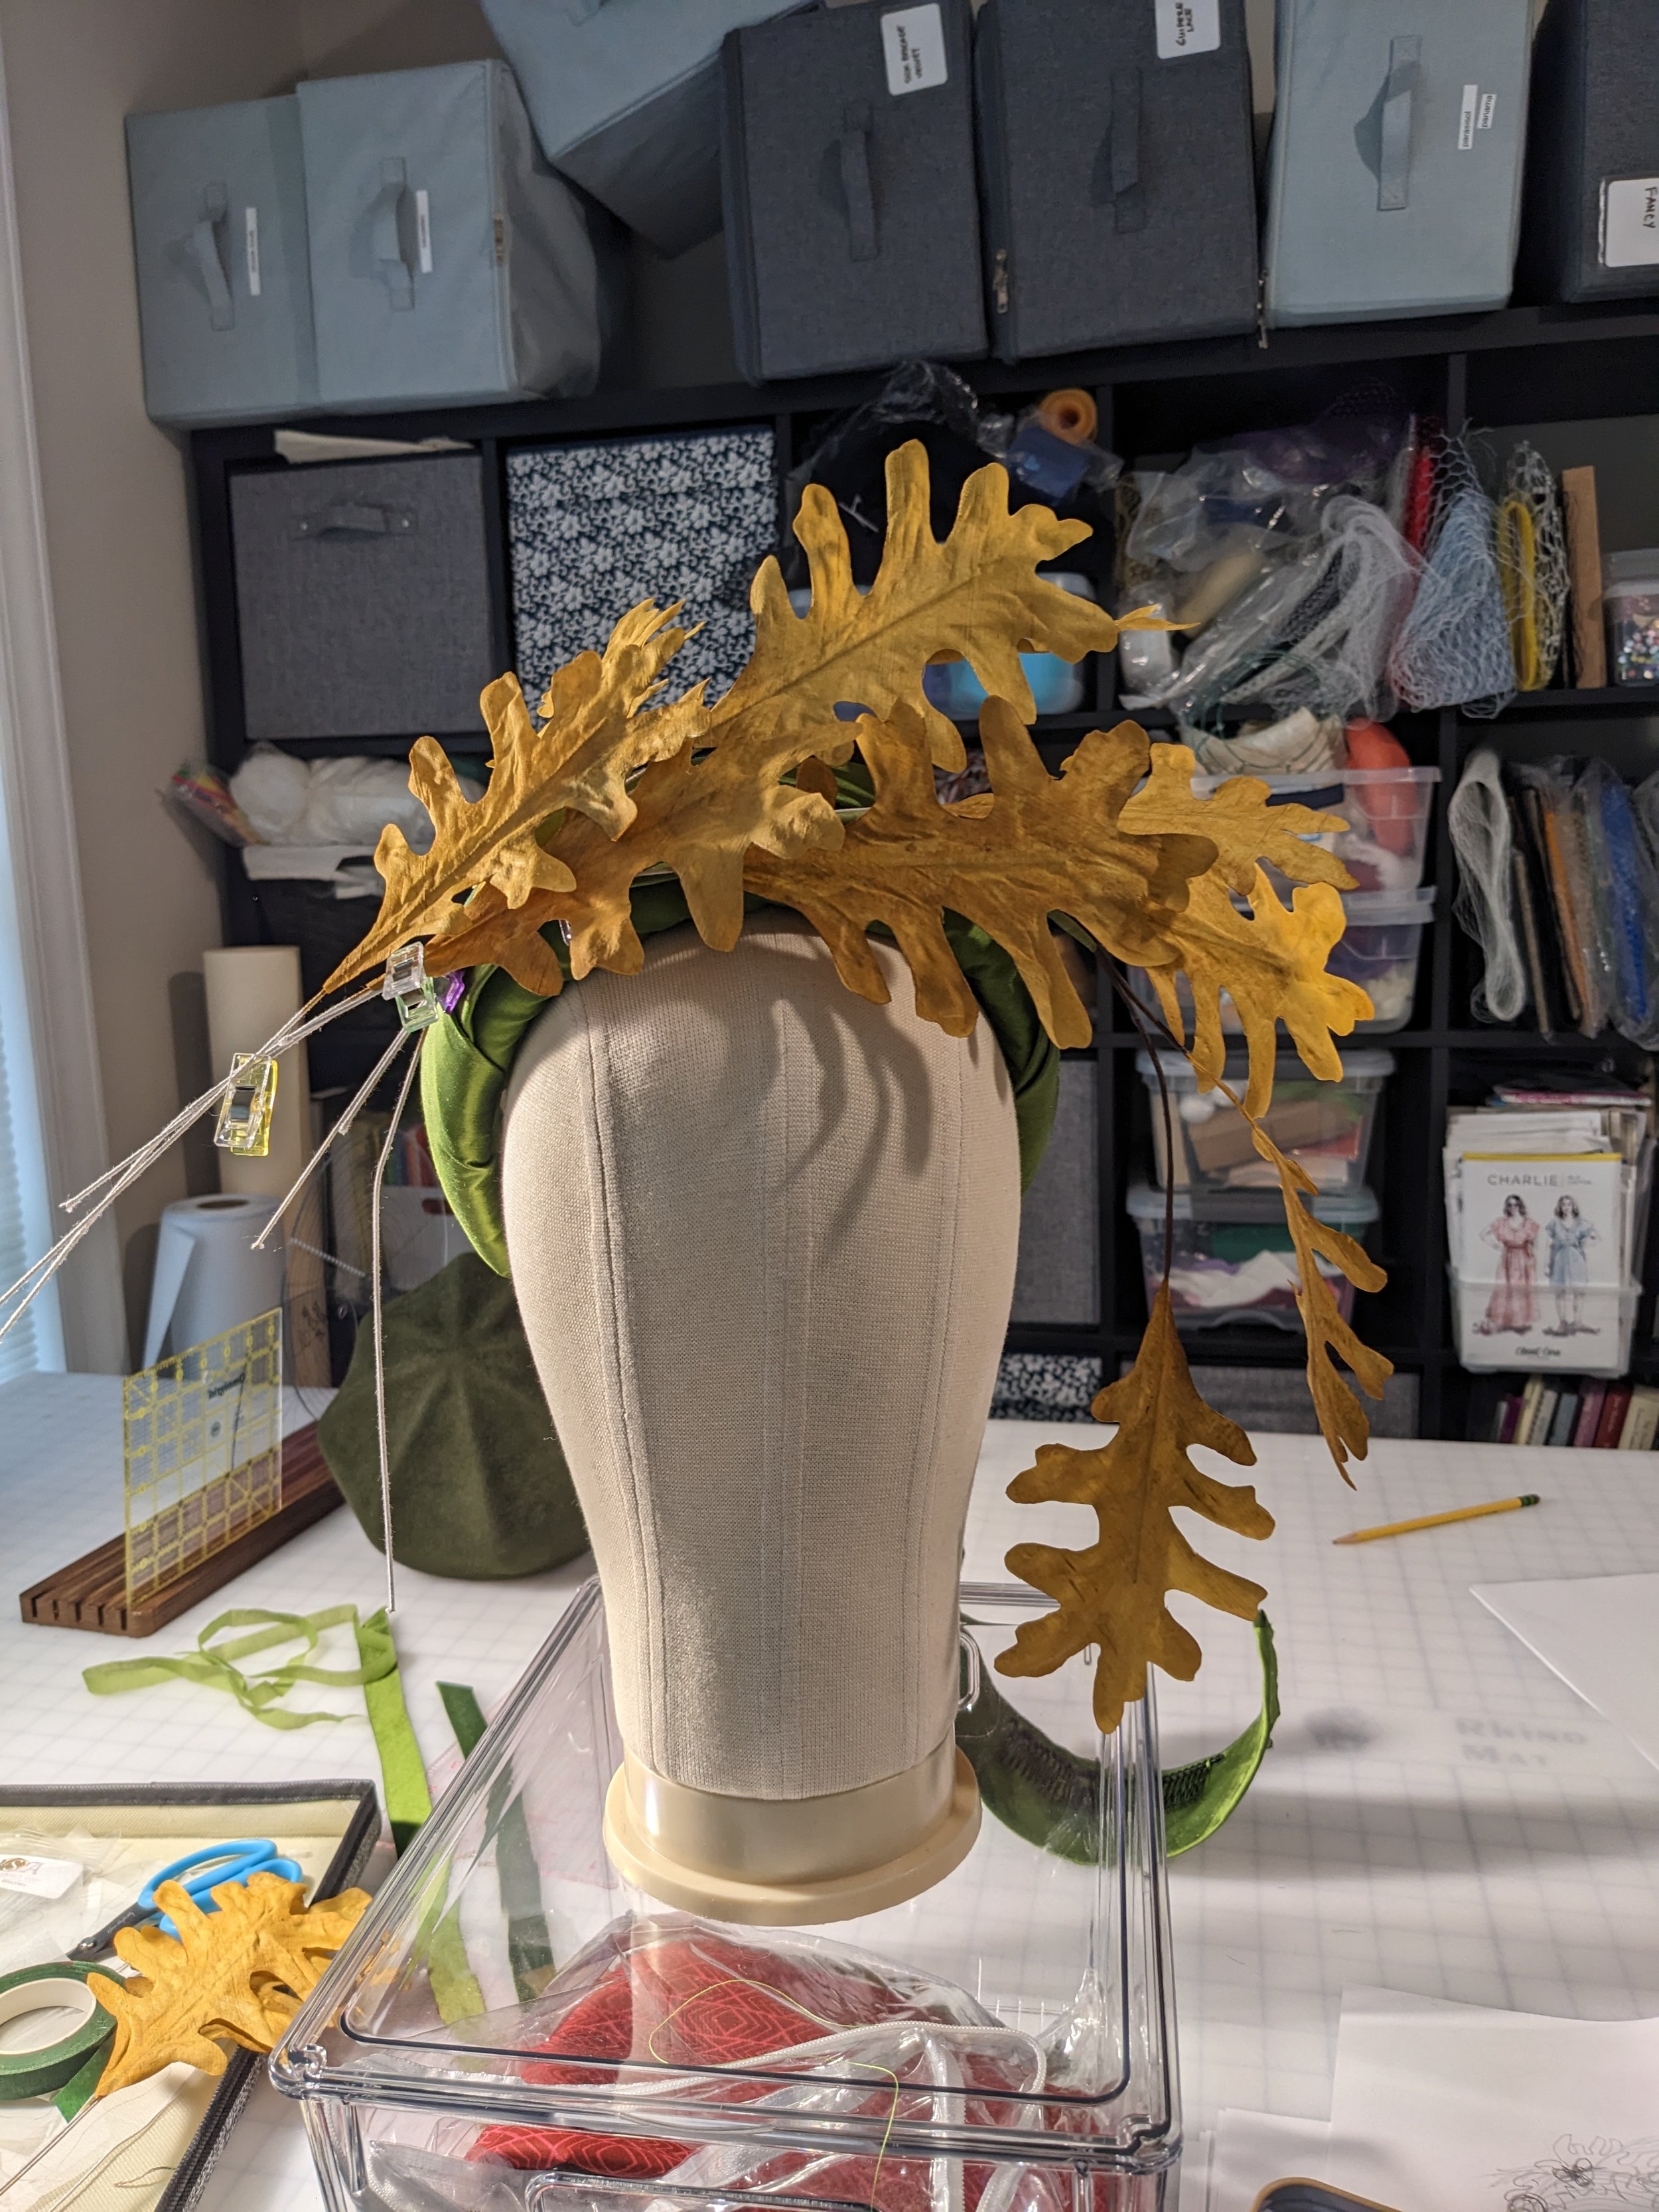
The most exciting and fun part of my job is actually putting it all together. Here I am trying different shapes and direction.
I tried to squeeze in all 12 leaves in the beginning, until I realized I needed to stick to my original sketch of seven leaves. This image has eight above, and still one too many. I like to work with odd numbers when it comes to any trim on a hat. I sewed the bias ribbon on right before the lining which took two tries to get it anchored down.
While driving to the museum, I looked at my hat and thought I should have made the bias ribbon much wider and fuller. Initially, I didn’t want the ribbon to take away from the leaves, but I don’t think they would. If I ever make a similar hat again, I might give that a go. These kinds of new ideas, even after I complete a project, makes my work interesting and challenging.